User Guide
Touchscreen Timelapse controller for Raspberry Pi and Adafruit PiTFT by David Hunt.
To get lapse.py to start at boot, we need to add a couple of lines to the /etc/rc.local file:
sudo nano /etc/rc.local
and add the following lines to the end, assuming you’ve installed the software in /home/pi/LapsePiTouch:
cd /home/pi/LapsePiTouch
python lapse.py
Then, when you boot the Raspberry Pi, you should observer the following sequence - The boot console:
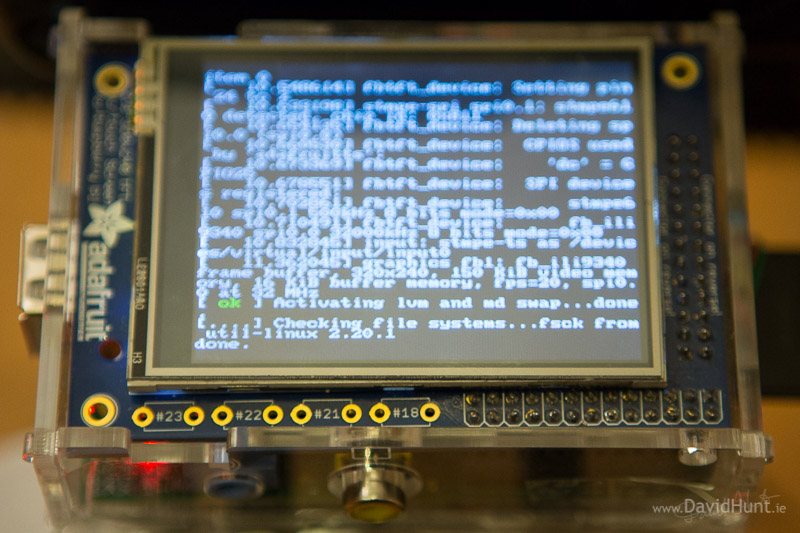
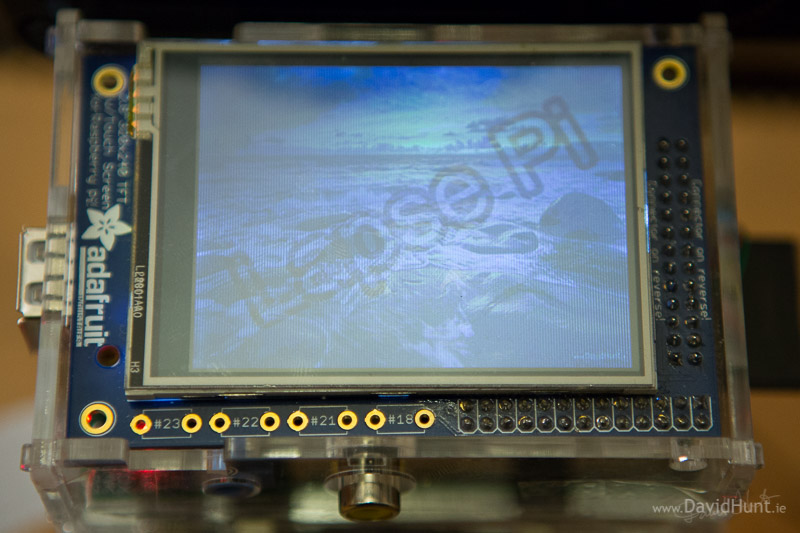
followed by the lapse.py splash screen.
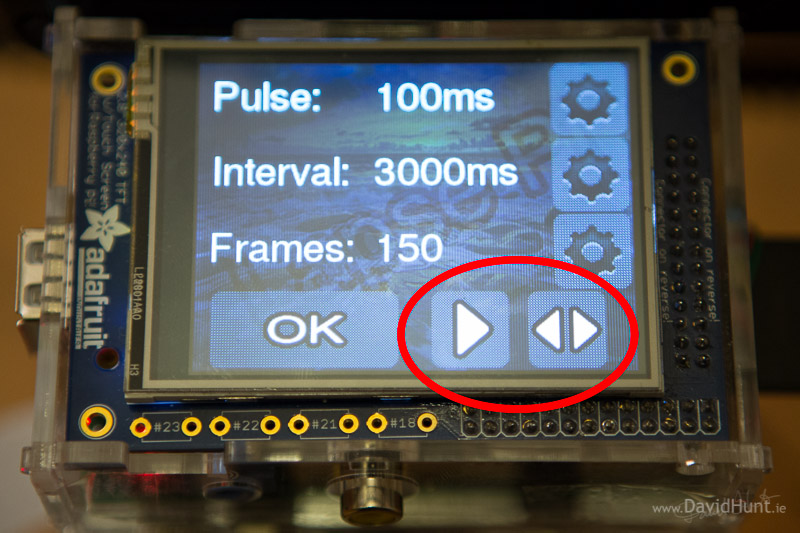
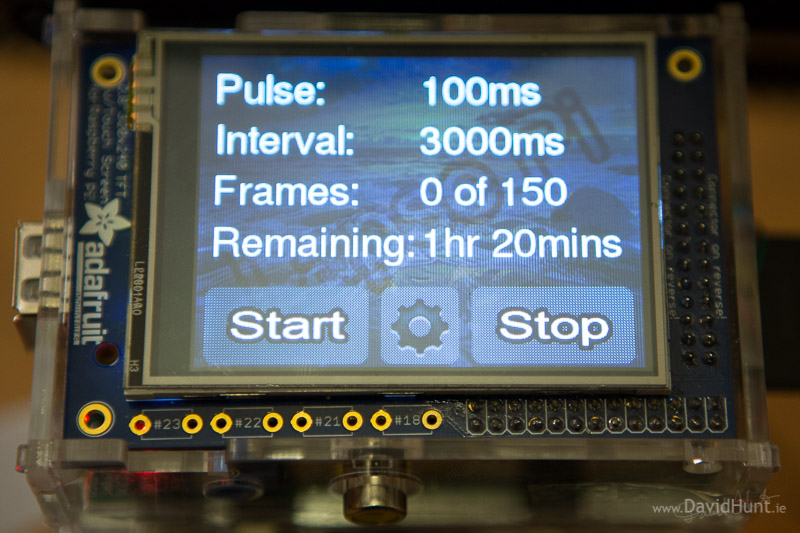
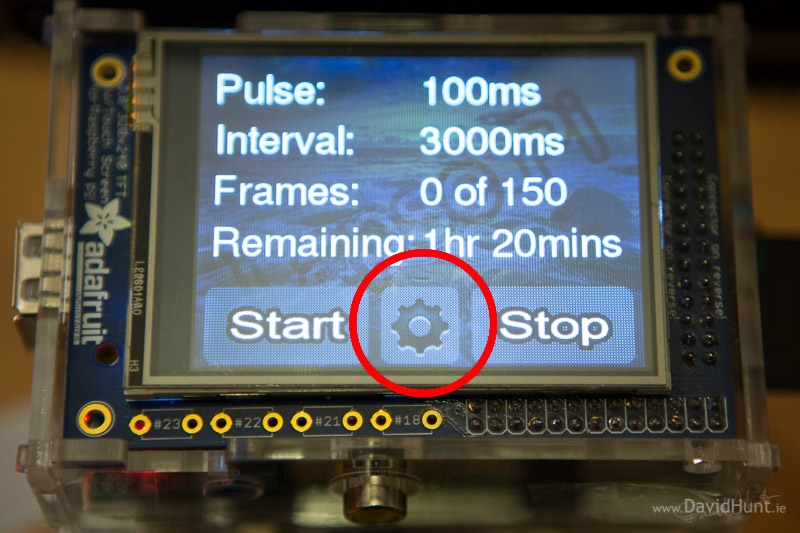
followed by the main Lapse-Pi screen. This screen shows the current settings, and allows the user to start/stop the timelapse process, as well as call up the screen that allows the user to change the settings.
Changing the settings is done my pressing the gear icon at the centre of the row of icons, which will then bring up the settings screen.
This screen allows the user to change the motor pulse, the interval between frames, or number of frames. To change any of the values, press one of the gear icons.
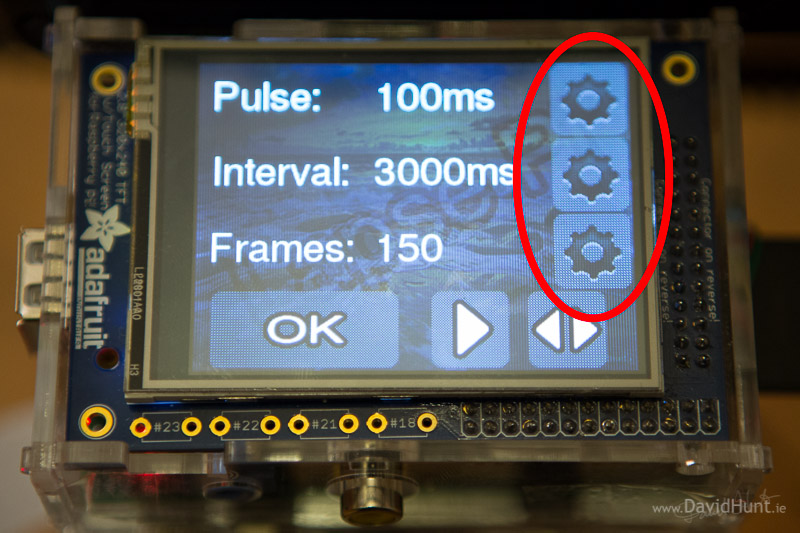
The pulse is the amount of time (in milliseconds) that the motor will be active between shots. Normally (depending on the motor) 150ms will be enough to move the dolly about 5mm. But again, that depends on the motor drive mechanism.
The interval is the delay between shots (again, in milliseconds). This is added to the pulse for the total time between shots.
And the images value is the total number of shots to be taken for a given timelapse sequence.
When you press the gear icon for any of the values, a numeric keypad is shown.
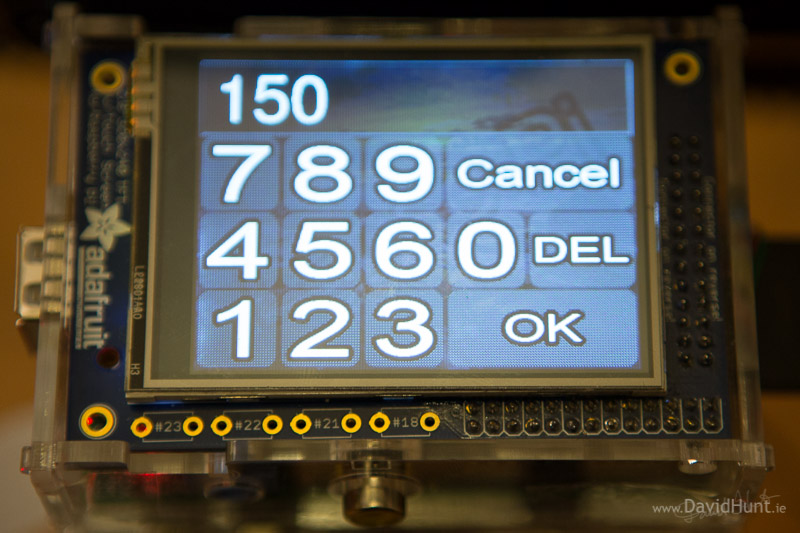
If you want to change the value, you press the ‘del’ icon to delete the digits, then type in the new value, and hit ‘Ok’
The right arrow and bi-directional arrow keys are for driving the motor manually. The right (play) icon will move the motor, whereas the bi-directional arrow will change it’s direction. THis allows you to move the dolly to the start of the rail before starting a timelapse sequence.